
These days security and trust are non-negotiable. If your WordPress site is still running on HTTP, it’s time to switch from HTTP to HTTPS. HTTPS encrypts the communication between your site and its visitors, protecting sensitive data such as login credentials, payment details, and personal information.
Not only does this enhance your website's security, but it also improves SEO rankings and builds trust with your visitors.
This guide will explain you through the steps to easily switch your WordPress site from HTTP to HTTPS, troubleshoot common issues, and enhance your site’s overall performance and security.
What is HTTPS?
HTTPS stands for Hypertext Transfer Protocol Secure. It’s the secure version of HTTP, the protocol used to transfer data between your browser and a website. The key difference between HTTP and HTTPS is the encryption that HTTPS provides.
When you visit a website with HTTPS, the communication between your browser and the website is encrypted using an SSL (Secure Socket Layer) certificate or TLS (Transport Layer Security) protocol.
This means that any sensitive data, such as usernames, passwords, credit card details, and personal information, is securely encrypted and cannot be intercepted or tampered with during transmission. The encryption ensures that third parties (like hackers) cannot access or manipulate this data while it's being transferred over the internet.
You can easily recognize an HTTPS-secured site by looking for the padlock icon in the address bar next to the website’s URL, and the URL itself will start with https:// instead of http://.
Why is HTTPS Important for Your WordPress Site?
Understand the below reason why switch from HTTP to HTTPS matter:
Enhanced Security: It encrypts data, protecting your users' sensitive information from cyber threats.
SEO Benefits: Google prefers HTTPS websites and ranks them higher in search results.
Trust and Credibility: The padlock icon in the browser builds trust with users, making them feel safe sharing personal info.
Required for Certain Features: Some modern web features, like HTTP/2 and progressive web apps, need HTTPS to function.
Compliance: HTTPS helps ensure your site complies with security standards and data protection laws, like GDPR.
HTTPS is essential for securing your WordPress site. It protects user data, boosts SEO, builds trust with visitors, and ensures compliance with data security regulations. Whether it's an e-commerce site or a blog, switching to HTTPS is crucial for your site's security and success.
Easy Way to Switch from HTTP to HTTPS in WordPress
Switching from HTTP to HTTPS is an important move for the security and credibility of your WordPress site. Here's a detailed, step-by-step guide on how to do it smoothly.
Step 1: Backup Your WordPress Website
Before diving into the HTTPS switch, make sure you back up your entire WordPress website. This way, if something goes wrong, you have a copy of your website that can be restored.
Backup Methods:
Use plugins like UpdraftPlus or BackupBuddy to create a full backup.
You can also manually backup your files and database through your hosting provider’s control panel.
Step 2: Obtain and Install an SSL Certificate
To make your website secure, you need to install an SSL certificate. This is the key step that activates HTTPS on your site.
How to Get SSL:
Check your hosting provider: Many hosts now provide free SSL certificates (via Let’s Encrypt).
If SSL is available: Log in to your hosting control panel (like cPanel or Plesk) and enable it from the SSL/TLS section.
If SSL is not available: Contact your hosting provider for SSL installation or purchase from a certificate authority (like Comodo or GlobalSign).
Installation Steps (for cPanel):
Need to log into your hosting dashboard.
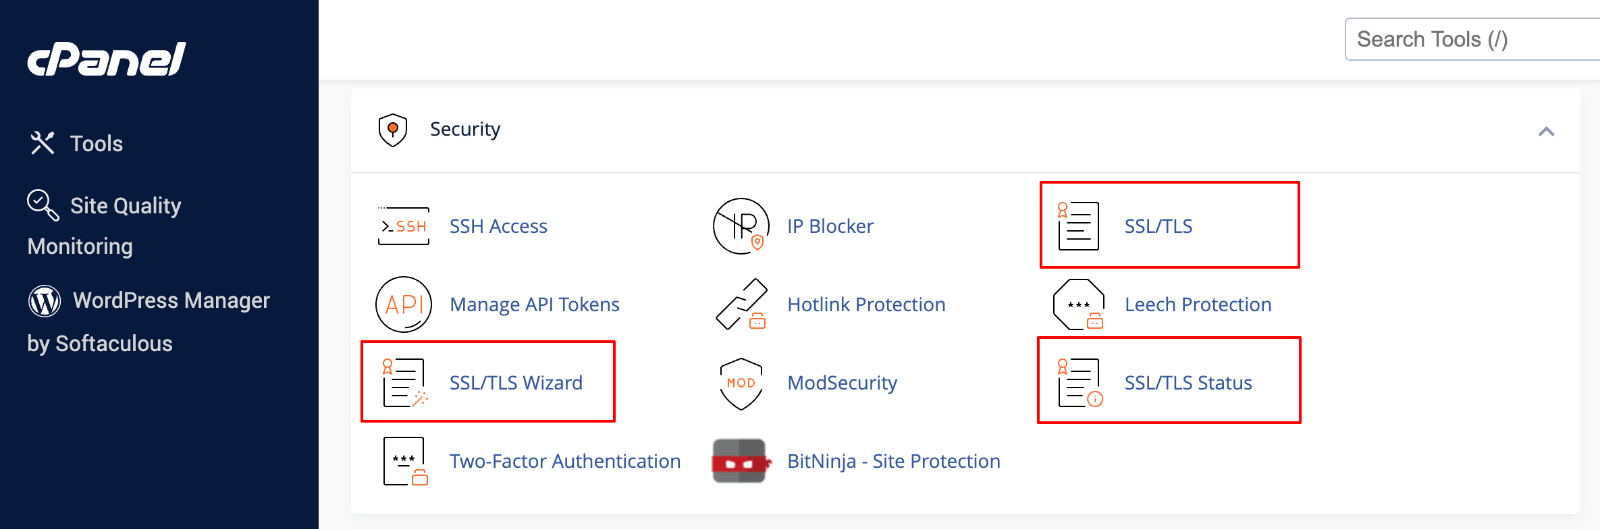
And, find the “SSL Certificates” or “Security” section.
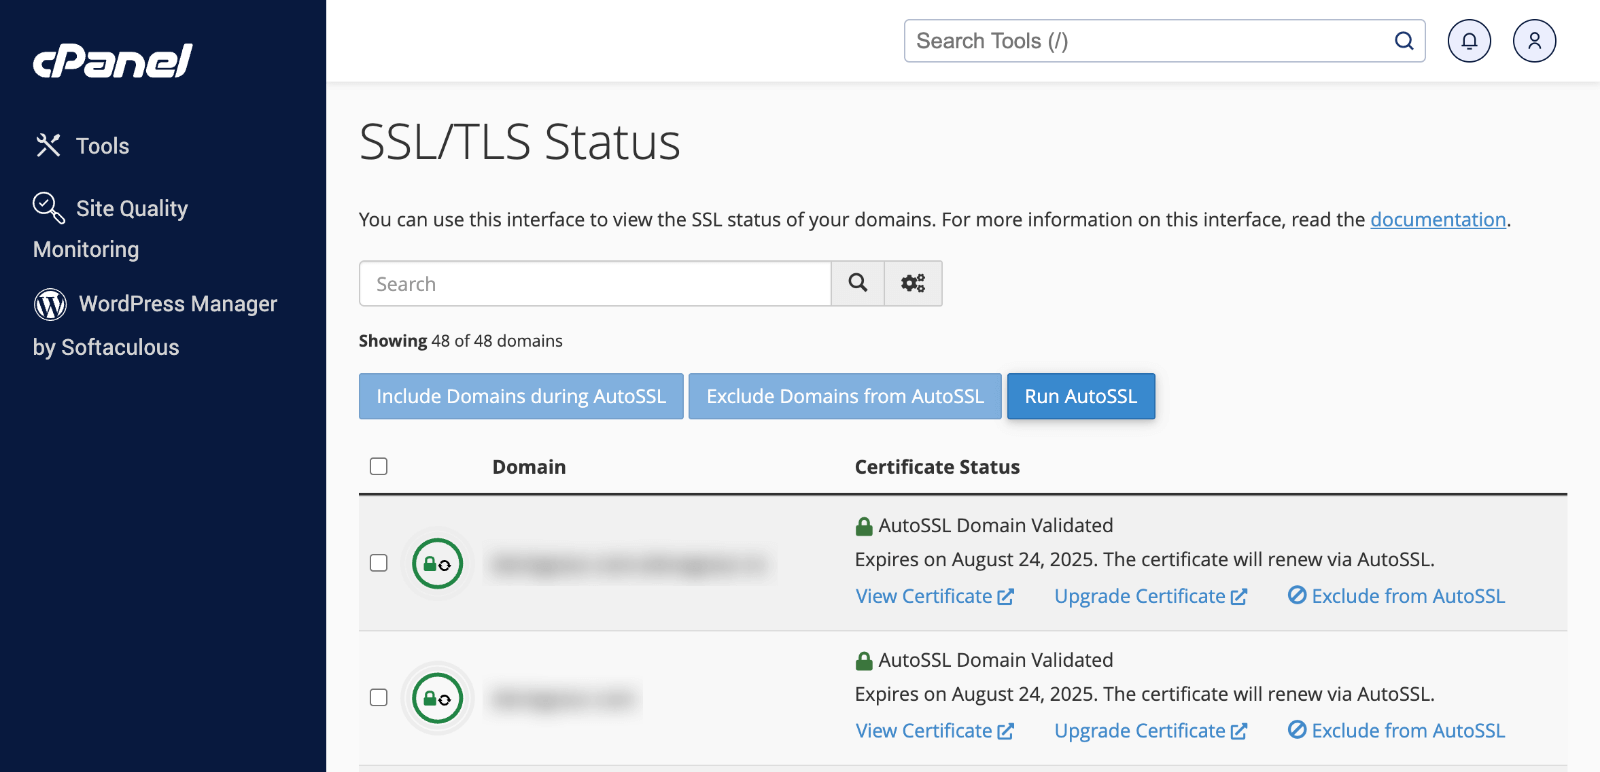
Then, enable SSL for your domain.
Wait a few minutes for SSL to be activated.
Once done, your site’s URL should change from http:// to https://.
Step 3: Update WordPress URLs in Admin Settings
With SSL installed, it’s time to tell WordPress to start using HTTPS.
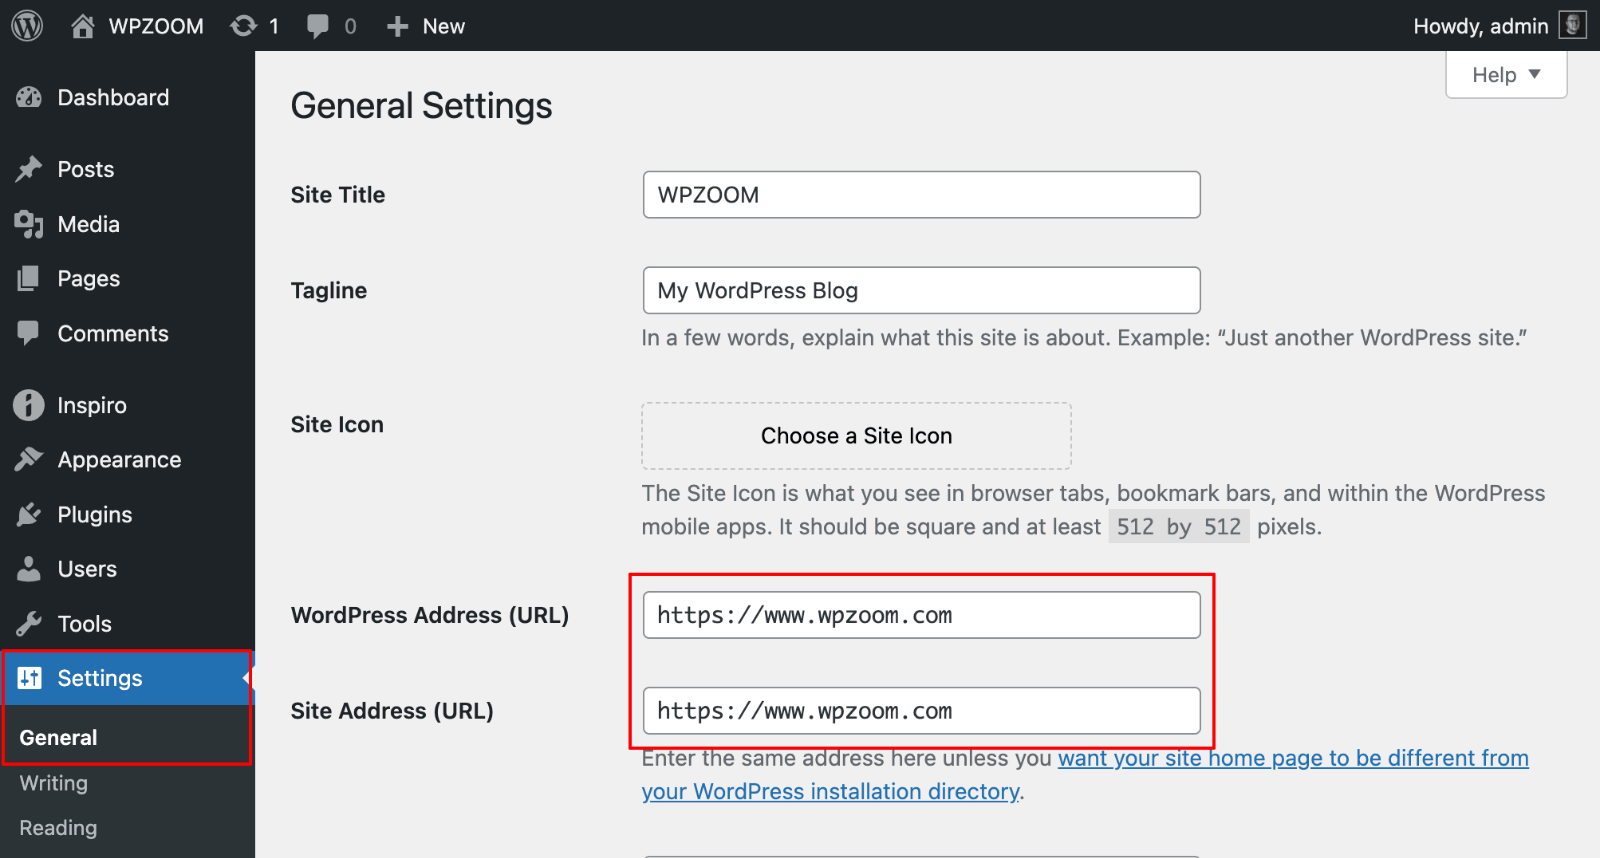
Log in to your WordPress dashboard. And, navigate to Settings > General.
Update both of the following fields:
WordPress Address (URL): Change from http:// to https://.
Site Address (URL): Change from http:// to https://.
Click the Save Changes.
Important Note: After saving, WordPress will log you out automatically. Log back in using the new https:// URL.
Step 4: Redirect HTTP to HTTPS Automatically
Now, we need to make sure that visitors who enter http:// in their browser are automatically redirected to https://. There are two ways to do this:
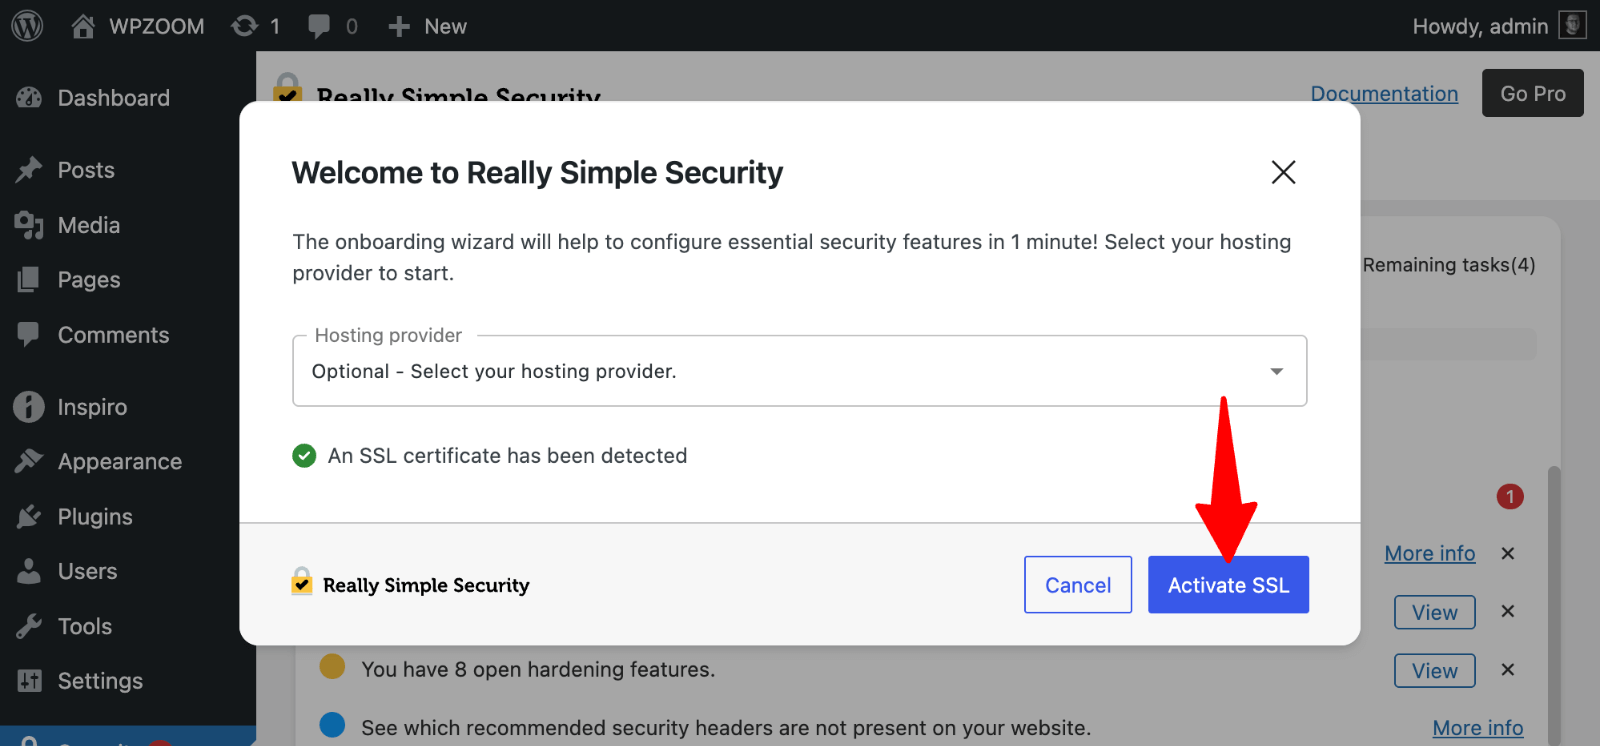
Method 1: Using the Really Simple SSL Plugin
This is the easiest option for beginners.
Go to Plugins > Add New in your WordPress dashboard.
Search for Really Simple SSL and click Install Now. Activate the plugin.
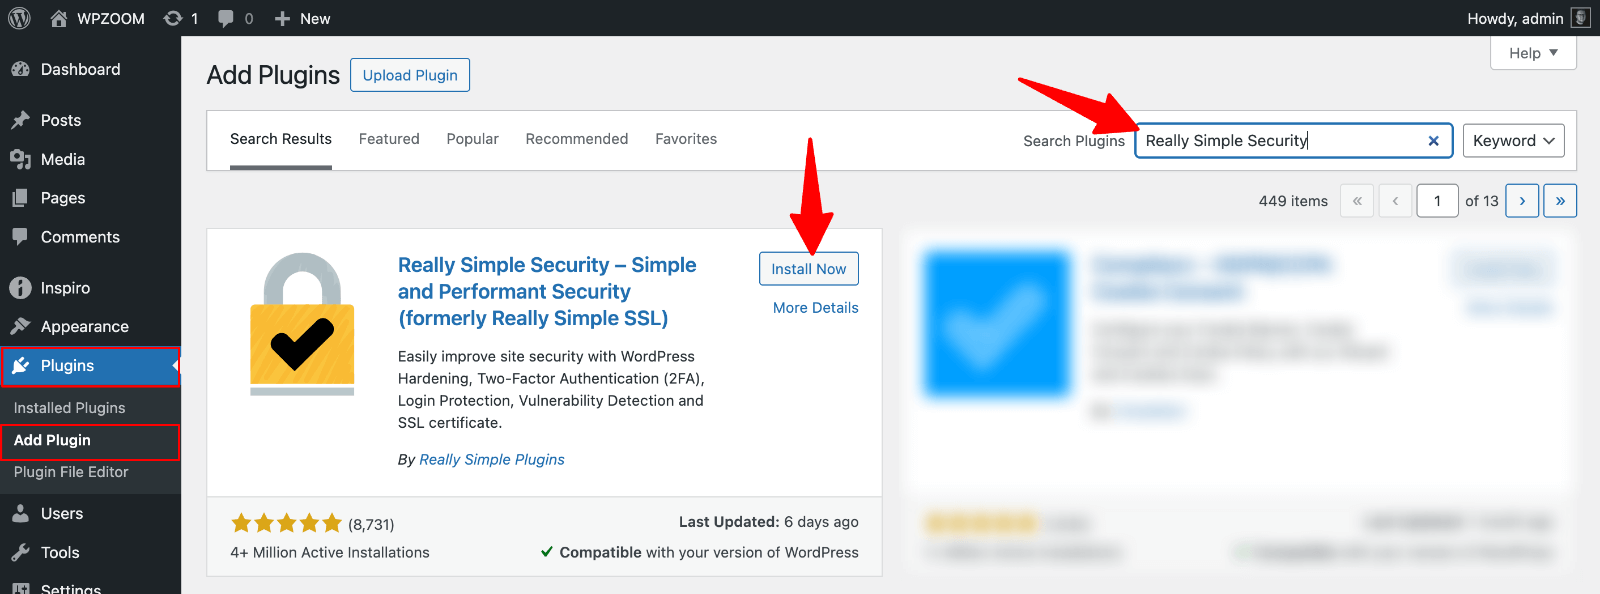
The plugin will automatically detect your SSL certificate and enable the necessary settings to force HTTPS on your site.
What Really Simple SSL Does:
Automatically redirects HTTP to HTTPS.
Fixes mixed content issues.
Forces SSL on WordPress admin and login pages.
Method 2: Manual Redirect via .htaccess
For more control, you can manually set up redirects via the .htaccess file (recommended for advanced users).
Access your site files via FTP or File Manager.
Open the .htaccess file (usually located in the root directory).
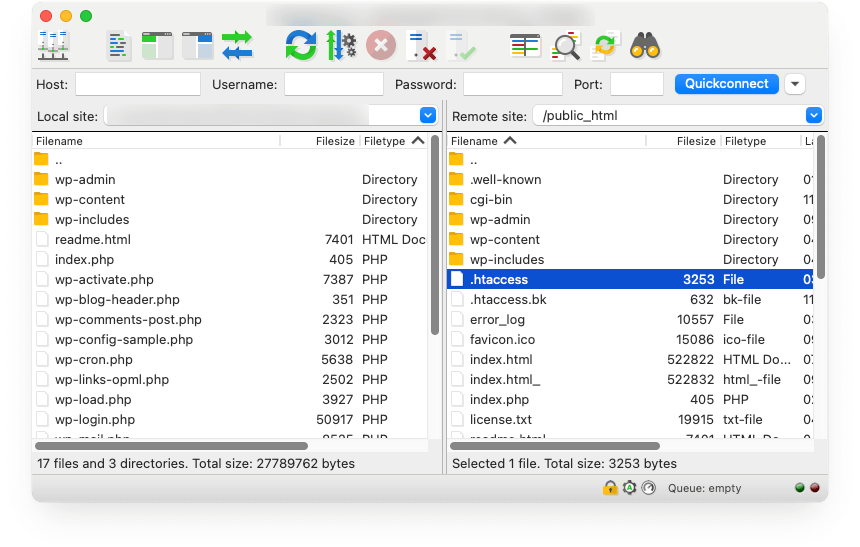
Add this code at the top of the file:
<IfModule mod_rewrite.c>
RewriteEngine On
RewriteCond %{HTTPS} off
RewriteRule ^ https://%{HTTP_HOST}%{REQUEST_URI} [L,R=301]
</IfModule>
Important Note: Always back up your .htaccess file before making any changes. An incorrect edit could cause your site to break.
For NGINX users: If you're using NGINX, add the following code to your NGINX configuration:
server {
listen 80;
server_name example.com www.example.com;
return 301 https://example.com$request_uri;
}
Step 5: Update Internal URLs
Now that you have successfully set up HTTPS, it’s time to update all the internal URLs in your WordPress database to reflect the secure https:// links. This ensures all your content is served over HTTPS, avoiding mixed content warnings.
Using the Better Search Replace Plugin:
Install and activate the Better Search Replace plugin.
Go to Tools > Better Search Replace. And, set up the search and replace:
Search for: http://yourdomain.com
Replace with: https://yourdomain.com
Select the database tables to update (you can leave it blank to update all).
Run the search and replace in dry-run mode first to preview changes.
Once you’re confident, uncheck dry-run and run the replacement.
This ensures all your links and media URLs are updated to HTTPS.
Challenges on Switch from HTTP to HTTPS and How to solve
Once you've switched from HTTP to HTTPS in your WordPress website, you may found some common issues. Don’t worry, these are typically easy to resolve with a few tweaks. Let’s explore them.
1. Mixed Content Issues
Mixed content happens when your site is served over HTTPS, but some of the resources (like images, scripts, or stylesheets) are still loaded over HTTP. This can cause warnings in browsers, or parts of your site might not load properly.
How to solve this:
Use Browser Tools: Open your site in a browser, right-click anywhere on the page, and select Inspect (or press Ctrl + Shift + I). Go to the Console tab to see any mixed content warnings.
Fixing Mixed Content Manually:
Search and Replace: Use a plugin like Better Search Replace to find any remaining http:// links in your WordPress database and replace them with https://.
Update URLs in Theme/Plugin Files: If some resources are hardcoded (e.g., in theme or plugin files), you may need to update them manually to use HTTPS.
- Using Plugin Help: Plugins like SSL Insecure Content Fixer can help automatically fix mixed content issues by updating URLs of resources that aren’t loaded over HTTPS.
2. SSL Not Showing on Admin Pages
Sometimes, your SSL certificate might not apply to your WordPress admin or login pages, making it look like HTTPS isn’t fully working.
How to Fix It:
Force SSL on Admin Pages:
Open your wp-config.php file, which is located in your WordPress root directory.
Add the following line of code before the /* That's all, stop editing! Happy blogging. */ line:
define('FORCE_SSL_ADMIN', true);
This will force HTTPS to be applied on all your admin pages, ensuring that you have a secure connection.
3. Redirection Loops
A redirection loop happens when your site keeps trying to redirect from HTTP to HTTPS, but for some reason, it keeps going in circles, preventing the page from loading properly.
How to solve this:
Check .htaccess File: If you've manually added a redirect in your .htaccess file (or via a plugin), double-check that there are no conflicting rules. You may have added multiple redirects, causing the loop.
Plugin Conflicts: Deactivate SSL-related plugins temporarily to see if one of them is causing the issue. If the problem stops after deactivating a plugin, try reactivating them one at a time to pinpoint the cause.
Clear Caching: If your site uses a caching plugin or your server has caching enabled, clear the cache to make sure the changes take effect.
Conclusion
Switch from HTTP to HTTPS in your WordPress website is a crucial step in ensuring both security and trust for your visitors. It protects sensitive data, boosts your SEO rankings, and helps meet legal compliance standards. While the process might seem complex, following the steps outlined in this guide will help you achieve a smooth transition.
Don't forget to address common issues like mixed content, SSL not appearing on admin pages, and redirection loops. With a few adjustments, you can easily solve these challenges and enjoy the full benefits of a secure HTTPS connection.
Remember, maintaining a secure website is an ongoing process. Regularly check for mixed content, renew your SSL certificate, and keep your WordPress version, themes, and plugins updated. By doing so, you ensure that your site stays secure and trustworthy, which is essential for both user satisfaction and long-term success.
FAQS
1. Why should I switch to HTTPS?
Switching to HTTPS secures your website by encrypting data, boosts SEO rankings, builds user trust with a padlock icon, and ensures compliance with regulations like GDPR.
2. How do I get an SSL certificate?
Most hosts offer free SSL certificates via Let’s Encrypt. You can activate it through your hosting control panel. If not, you can purchase one from a certificate authority.
3. What is mixed content, and how do I fix it?
Mixed content happens when some resources (like images) load over HTTP on an HTTPS site. Fix it by using plugins like "Better Search Replace" or "SSL Insecure Content Fixer."
4. What happens if I don’t switch to HTTPS?
Not switching can harm your SEO, trigger browser warnings, and deter users, especially when sensitive data is involved.
5. How do I fix a redirection loop?
Check your .htaccess file for conflicting redirects, disable SSL plugins temporarily, and clear your site and browser cache to resolve the issue.